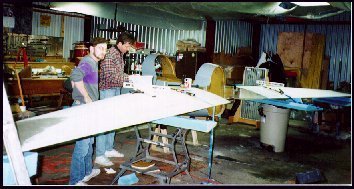
What a treat! I finally get to put the wings on the plane. This is by far the most inspirational portion of the kit thus far. My experience was highlighted by a special visit from Dave Ronneburg, the Berkut's designer himself. At the time my wings were being installed, the construction videos for the wing installation were not yet complete. Dave was able to take a short trip out to Texas and film the installation of my wings. So, if you build a Berkut too, you will see my aircraft featured in that section of the videos.
The process begins by supporting the wings with whatever you can scrounge-up, strapping the wings to the spar, and establishing a level reference from tip to tip - full span. This is a difficult and time consuming process that requires several minor adjustments be made, measured, and re-measured. The alignment of the wings directly affects the flight characteristics of the airplane.
Burt Rutan was always proud of the wide, acceptable tolarances that the Long-EZ's flight surfaces had built into them - the Berkut is the same way. However, the closer to die-straight your wings are - the more efficient the wing will be and the better the plane will feel in flight. I've seen some Long-EZ's (and other canard variants) flying smoothly today with 1/2" or greater deviation between the wings.
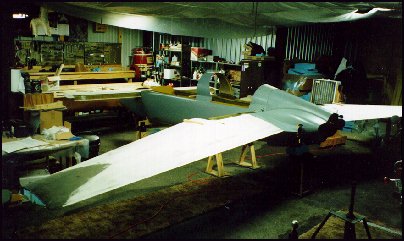
I got lucky! My wings are accurate to within 1/16" of an inch - FULL SPAN! We used a transit mounted in front of the airplane (its the red tri-pod at the far left in the pic), established right/left level reference with a water level and measured the wings in-between. Because the wings did not have any unwanted twist and the spar was installed accurately - the wings fell right into place. In Dave's experience, he said these were the most accurately aligned wings he had ever seen - including the Berkut Prototype. (Success!!)
Here is a picture of the completely installed wings and cowls.

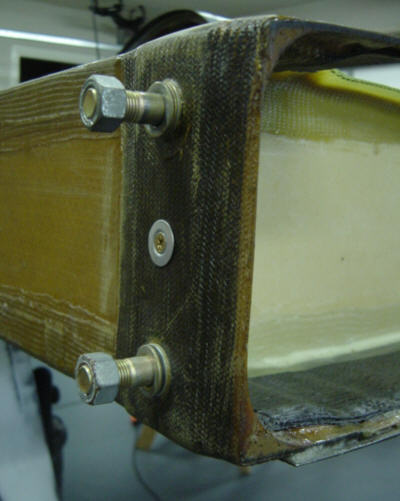
The original Berkut design included a 3-inch hole in the bottom strake to allow access to the heads of the outer bolts that attach the wings. Recently, a 'U' shaped aluminum extrusion was found with the perfect dimensions to fit the bolt heads. So, now the bolts are retained with the extrusion AND are not allowed to turn. No hole in the lower strake is required making a cleaner lower surface. A single small bolt hold the extrusion in place. Simple, lite and effective!
 Back to the Proto-page