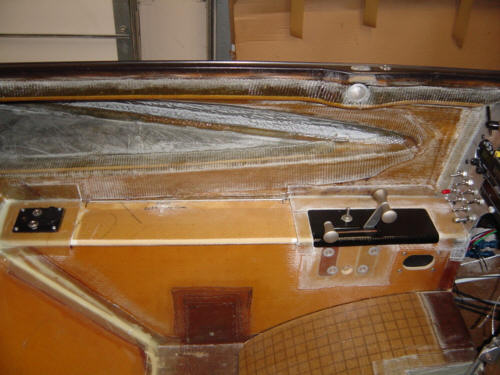
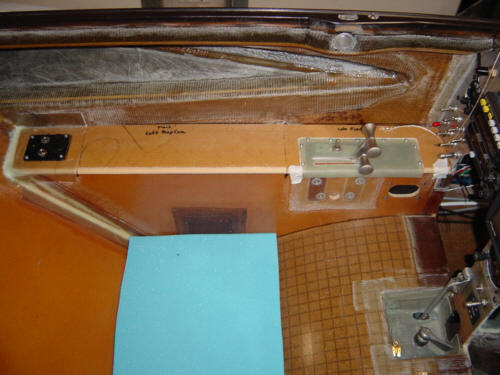
The front left console is the most complex as it serves as the throttle cover, a map case with hinged cover, and the pilot's music/headset/mic and power port plug mount. The right side usually hold the circuit breakers and some switches for standard Berkuts - but since I went with fuse blocks, that side will just cover the aileron torque tubes. So, off we go!
First thing I did was cut the bulkhead stock down to size and did I trial-fit for the left console sections and did the same for the right side too. The vertical sides of the consoles and the throttle quadrant were installed previously - check past sections for that process. I cut the top bulkhead into 3-sections, and installed a transverse bulkhead just aft of the throttle cover as prep for the next section.
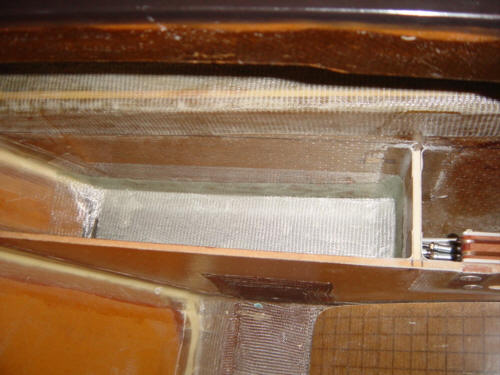
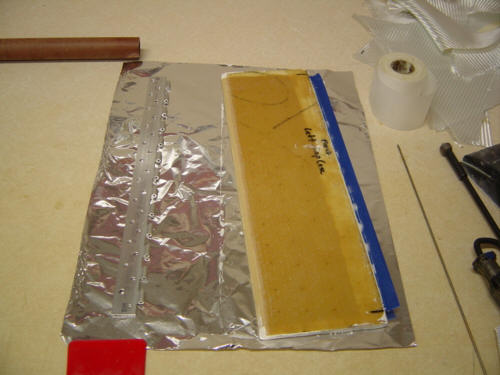
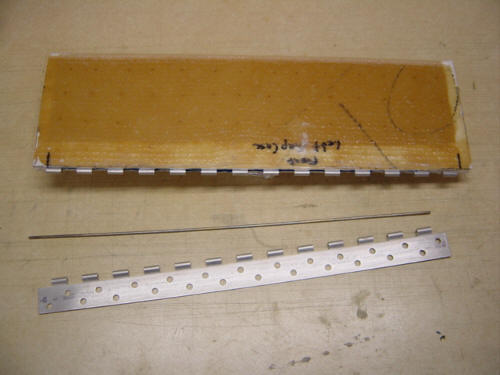
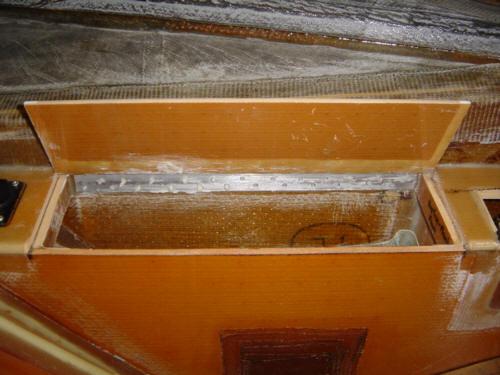
As I mentioned before, the center portion of the left console is used as a map case or storage area - so I have to make a bottom floor for the case. I first took some scrap aluminum, cut it to fit between the fuselage wall and the vertical wall, and covered it with packing tape as mold release. I layed-up some 2-ply BID on the aluminum to form the removable floor for the map case. And, as you can see here, it works just fine.
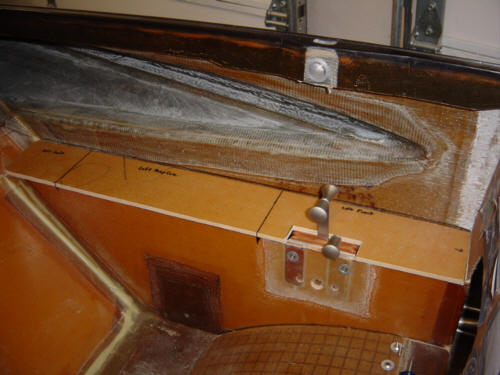
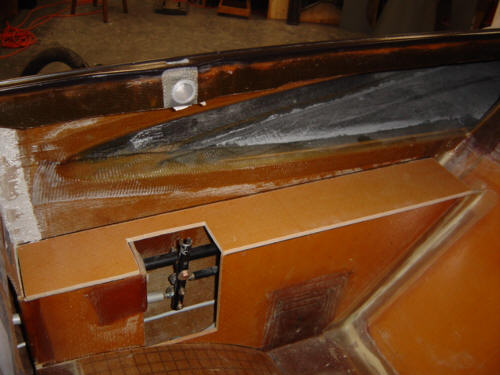
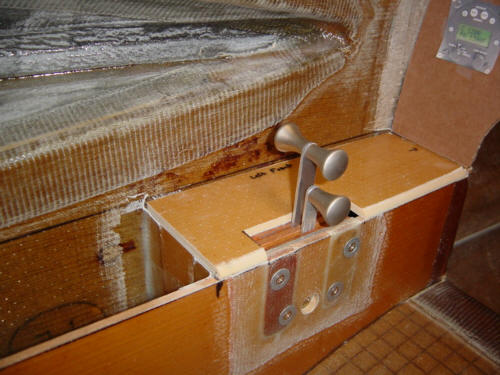
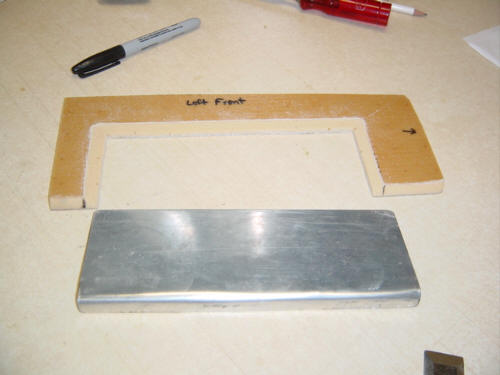
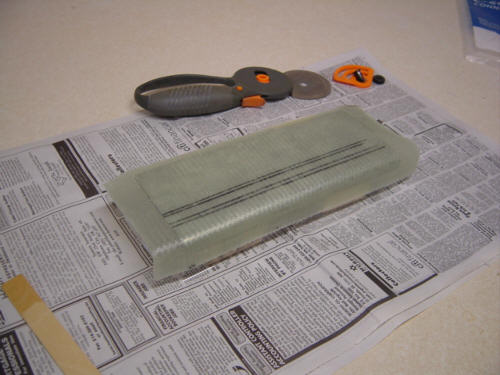
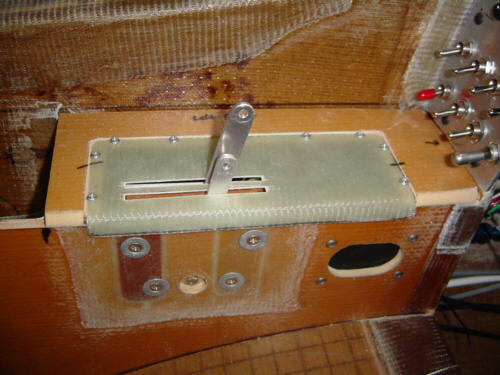
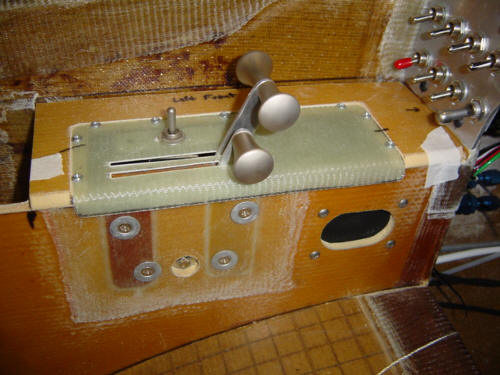
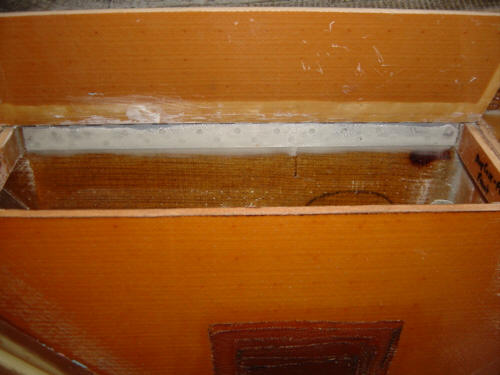
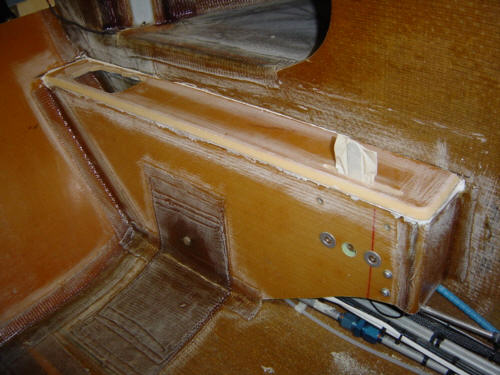
Back to the throttle cover. Since this area houses the throttle quadrant, the belly brake switch, and lots of wires and hard lines...it is important to be able to get in there for service. So, a large area of the top section (big enough to get your hand in) is cut away and a metal plate is cut to fit. This metal plate then becomes the mold for the 5-ply BID removable cover that goes over this area. Slots are cut into the cover to allow the throttle levers to stick through. The removable cover is then secured to the top bulkhead with small screws. You can also see the belly brake "pinky switch" that was installed next to the throttle for easy operation.
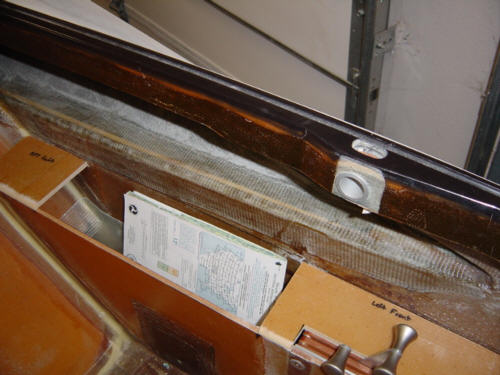
The aft section is simply bonded into position using 2-ply BID tapes. The hole in the center was cut out to make room for the pilot music/headphone/power port bracket. The wires are routed below through a hole in the map case floor pan. Ta-daaaa!!...that one was easy. Now, the hard part - the hinged door for the map case.
I started by removing the foam from the edges of the map case lid and filling them with micro. In the back edge, I buried half of a piano hinge into the micro. The other half of the hinge is bonded to the fuselage sidewall with flox and then covered with 1-ply of BID glass. While this was curing, I also used 2-ply BID tapes and attached the forward console panel. After cure, and a little primer and black paint on the throttle cover, I was finished with the left front console. I still have to do some sanding and painting, but the structure is complete.
The right side was a snap! All I had to do is cut and trim the top to match, bevel the inside edge, and bond in place with micro. Then I just used 2-ply BID tapes to attach. That's all there is to it...until it is time to surface everything...(sigh)!!
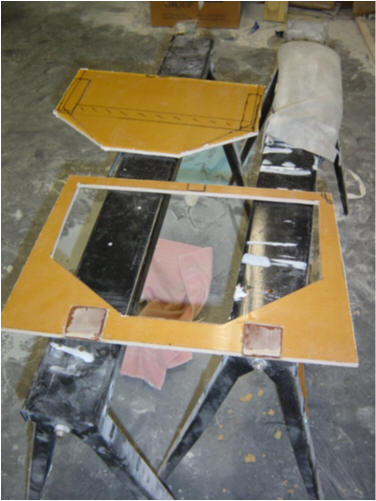
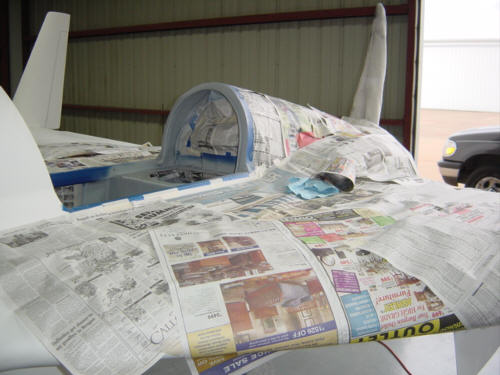
This is about as far as I have progressed back here mainly because I have to finish all the work in the aft compartment before this all gets closed out. Here is a old picture of the rough-cut consoles in the back. Looks better than your Lazy-boy at home, huh?!?
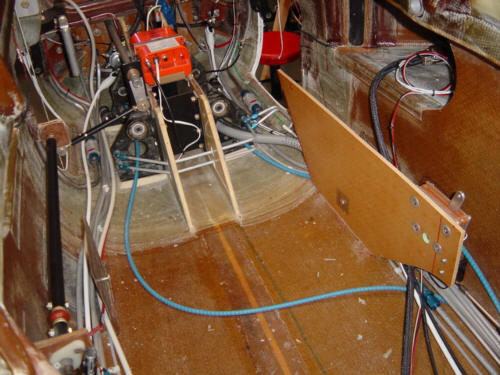
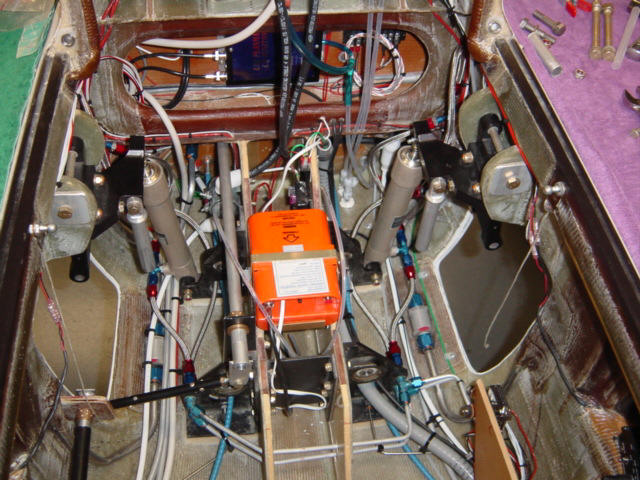
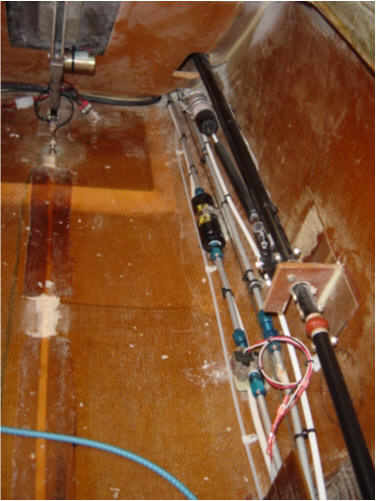
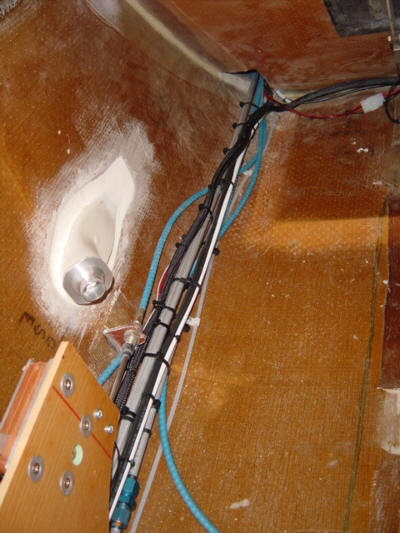
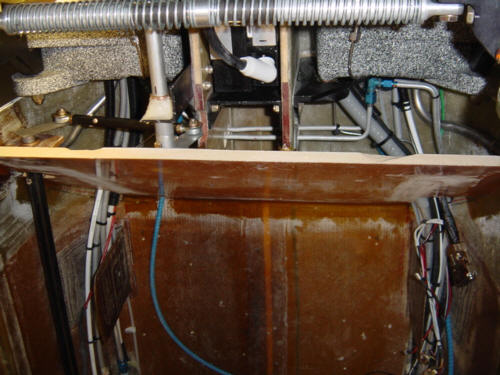
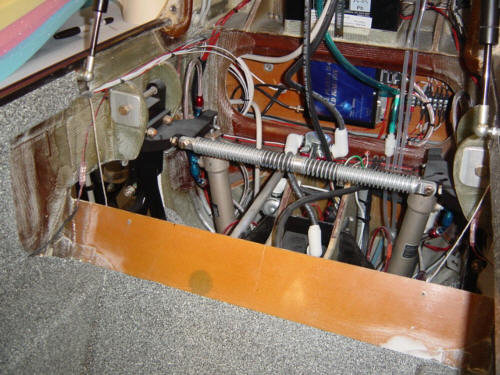
UPDATE 3-7-04: I cleaned up and tied down all the lines, wires, conduits, cables, etc. I started at the back of the plane and worked forward. Man, it is getting crowded back there!!! I bundled and separated all the electrical cables from metal lines with stand-offs. This way there is not a possibility of wire chaffing and a possible short circuit. After the aft compartment was organized, I went after the middle. The right side had the most lines and was the most difficult. The left side was easier actually took more time because it required more stand offs. Both sides came out great! I can't wait to get this thing buttoned up and ready for engine start!! Yahoo!!!
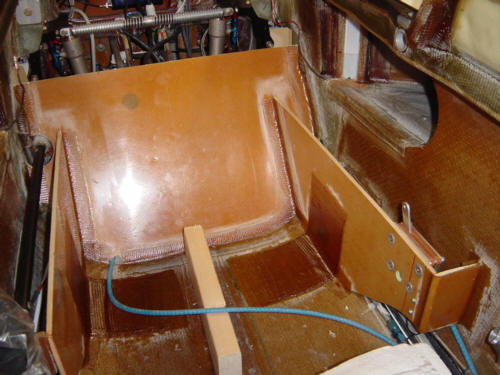
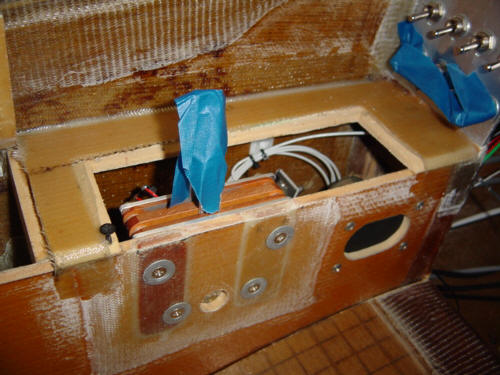
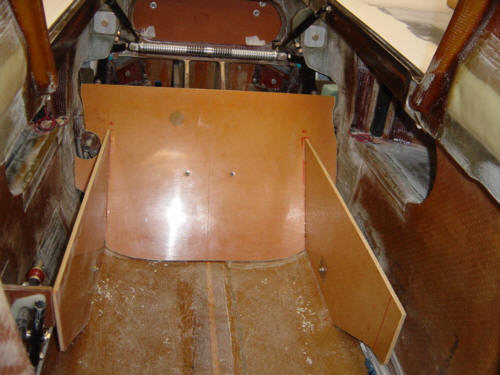
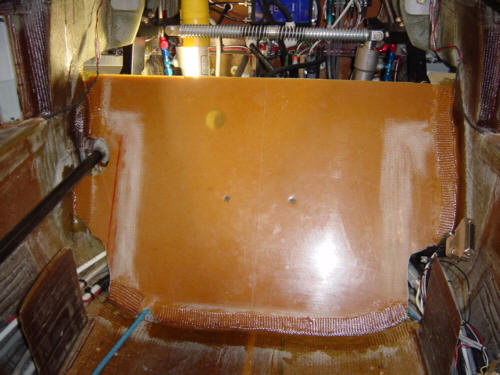
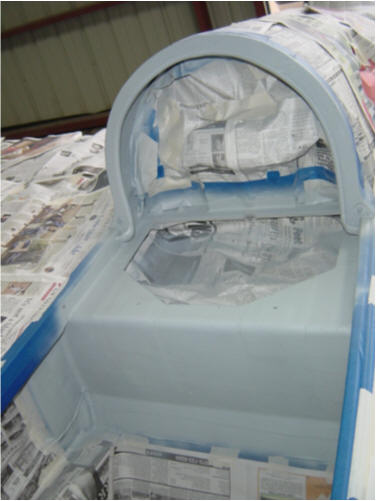
UPDATE 4-25-04: Now that the gear is functioning and fully tested for leaks, I am getting around to installing the rear seat. Sandy is happy about that as she finally has a place to sit. ;-) This installation was a royal pain in the butt! I bonded the rear seat bulkhead with 2-ply tapes all around. The front was not a problem, but the aft side was the problem. As you can see here from above, I had to work standing on my head...and in very cramped areas. I'm glad that's over! I then installed the side console panels, seat belt hard points, and forward bulkhead.
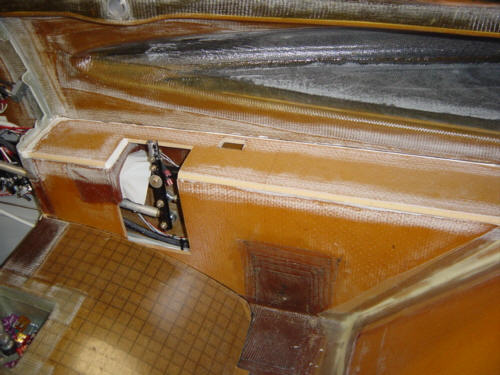
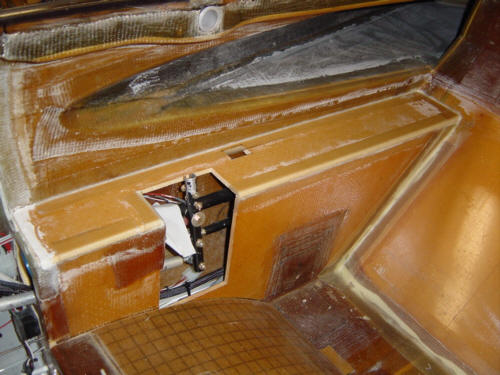
UPDATE 5-2-04: I finished up the rear seat consoles by attaching the tops. The process was the same for the front seat so I will not bore you with the details. The only deviation was a slot for the rear throttle arm to stick through. Here are a few pics of the left side microed, right side microed, left side attached, and right side attached.
UPDATE 5-16-04: I was originally going to leave the back seat upper support off until after first flight�but I realized I'd need it to finish the read seat cushion and take measurements for the harness. So, I went ahead and attached it with micro and 2-ply tapes on the aft face perimeter. I did not tape the front as large lay-ups are added in this area when the top is added to accommodate the harness hard points. I'll do THAT after 1st. flight for sure.
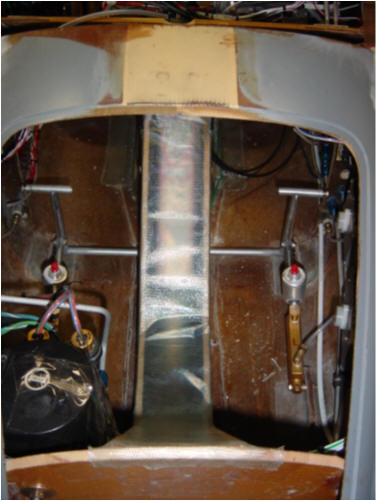
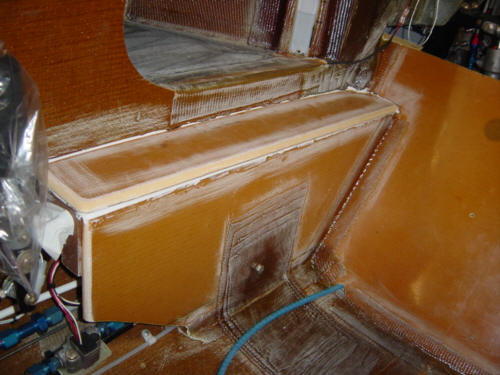
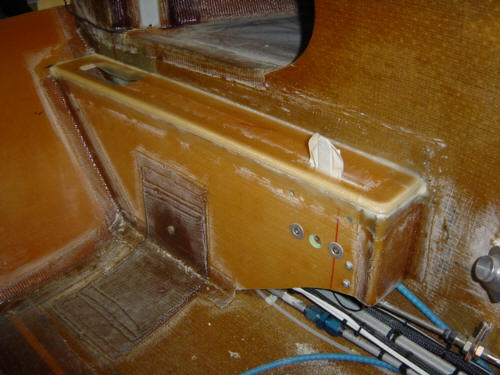
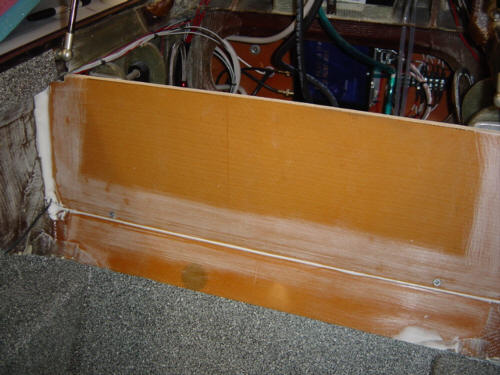
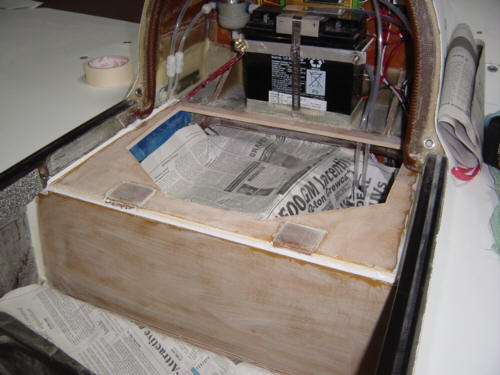
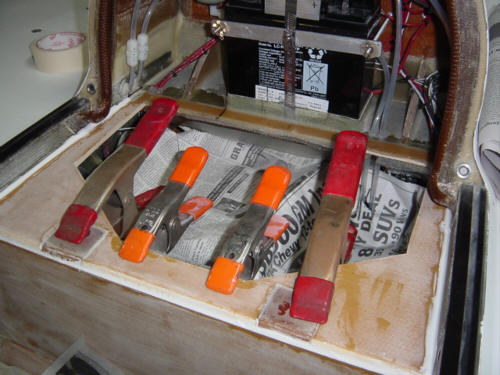
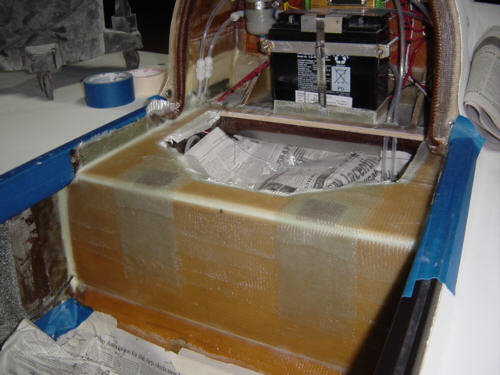
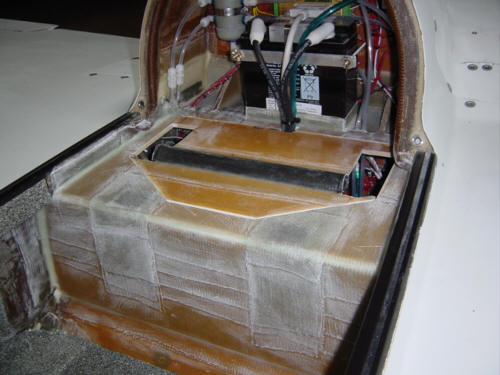
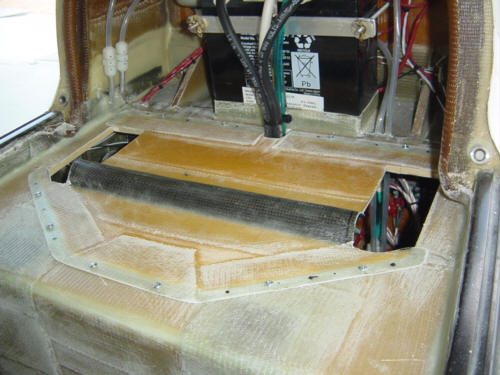
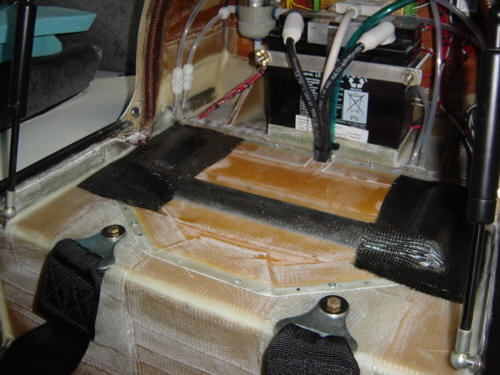
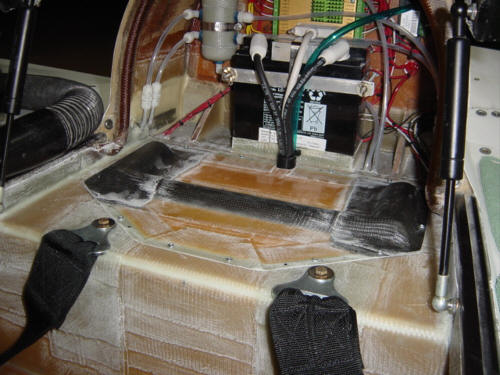
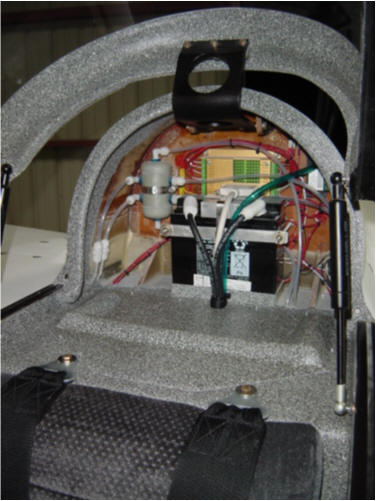
UPDATE 9-23-04: I've got 16 hours of flight time on the plane and I'm just now getting around to finishing primary structure....sheesh! Well, actually, this is not structure...just required to take a passenger along...and that time is coming. The back-seat upper bulkhead also acts as the shoulder harness hard point, and has an access door built in for maintenance of the gear systems. To start, I trimmed the bulkhead stock to fit, and cut out the access door. I removed the foam from around the perimeter of the door, and replaced it with micro. Since there is only going to be a lip on the top side of the door panel, I wanted to connect both the upper and lower skins to increase peel strength a little more. I also added two phenolic hard points for the harness bolts to attach through. Next, I sanded all the surfaces and microed the upper frame into place. Once the micro was semi-cured, I added all the lower BID tapes and a 18" long, 1"x1.5" 2024-T3 aluminum angle bonded to the underside of the hard points. The harness bolts will go through this angle too and tie all the lay-ups together in shear. So, it's time to give this little bulkhead some strength. Tonight, I added all the plys of BID and UNI that make up the strength of the bulkhead. Needless to say, you can see that there is a lot of glass back there. I'll let this cure and clean it up tomorrow and the structure will be almost complete. Here is what it looks like all cleaned up with the access door fitted and in place. I then put packing tape all around the access door parimeter, sanded the door, and put down 3-ply BID tapes around the edges. This will serve as a mounted flange and help seal the border of the access door. Just looking at this structure - I the noisy cockpit problems should go away once the door is in place. So, what about those two big holes...well, I need to close them off too...so I did! I put the plane up on the stands again and retracted the gear so the pivot arms would fill the holes. Then I took a couple shop towls and draped them over the arms - making a little spacer. Then took some poster board paper, taped one end to the underside of the door, and ran it over the spacer towels - this scribed an arch over the arms to act as a mold. I put packing tape over the paper and around the door for mold release, sanded the door and put the same 3-ply glass-carbon-glass BID layups over the mold.
Holy crap...I'm about 1 hour of work away from having the ALL the primary structure complete on this airplane! Another milestone...who'ed a thunk it! Actually...correction...it's done!!!!
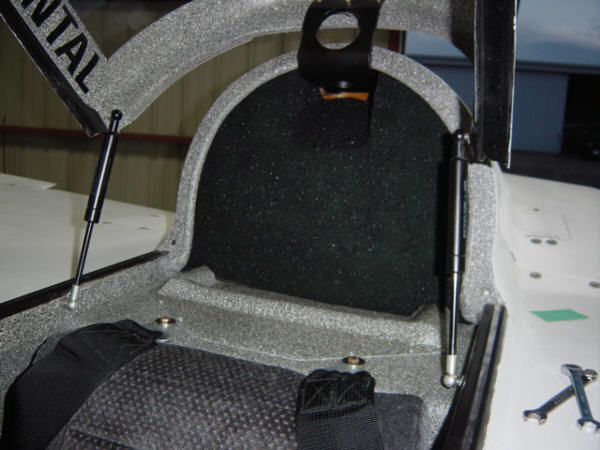
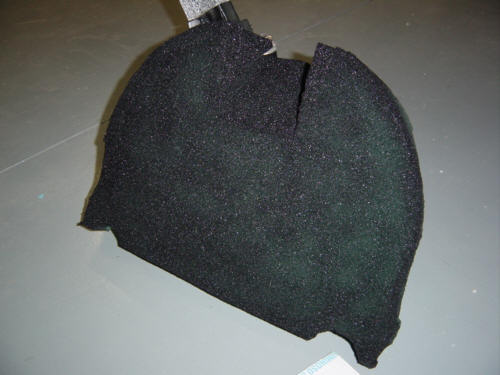
UPDATE 10-9-04: The forecast here has been calling for rain for several days straight, so I decided to finish up some cosmetic work I've been meaning to do. I started with the back seat so Sandy can ride in style when she takes her first flight. I took the canopy off and papered and taped off the entire aft end of the fuselage. I used the same primer as I did before, then shot the Zolatone and poly-urethane clear coat on top. The end result was very nice and blended in nicely. To finish off the aft section, I took some normal green foam and cut and contoured it to fit the aft turtle deck. I don't have time/money to have it upholstered just yet, and I didn't want a bright green blob in the back - so I painted it black. This high-density foam is lighter than Confor foam I used in the seats and should also help mute some engine noise as well. Not to mention, it helps make the aft compartment look more complete.
Super simple stuff here - a 2-ply BID cover that seals the nose gear mechanism from the rest of the fuselage. Mainly, this is only there so that the area can be used for baggage...and when it is, so you don't dump your stuff over a Nevada desert while on approach to Las Vegas! This picture is of it in the raw. I'll paint it or something and make it all pretty for no-one to see. Oh, well. (sigh)
 Back to the Proto-page